Automatic Remediation on AAP2 using Insights
Automation controller supports integration with Red Hat Insights. Once a host is registered with Insights, it will be continually scanned for vulnerabilities and known configuration conflicts. Each of the found problems may have an associated fix in the form of an Ansible playbook. Insights users can create a maintenance plan to group the fixes and, ultimately, create a playbook to mitigate the problems. Automation controller tracks the maintenance plan playbooks via an Insights project. Authentication to Insights via Basic Auth is backed by a special Insights Credential, which must first be established in automation controller. To ultimately run an Insights Maintenance Plan, you need an Insights project, and an Insights inventory.
Create Insights Credential
The firs step is to create an Insights credential, so we can log on our Insights account and retrieve information.
The important fields you need to field are:
- Credential type: Insights.
- Username: Your Insights username.
- Password: Your Insights password.

Create an Insights Project
Next, you need an Insight Project in order to retrieve the information from your Insights machines.
The important fields you need to field are:
- SCM Type: Select Red Hat Insights.
- Insights Credential: field is pre-populated with the Insights credential you previously created. If not, enter the credential yourself.
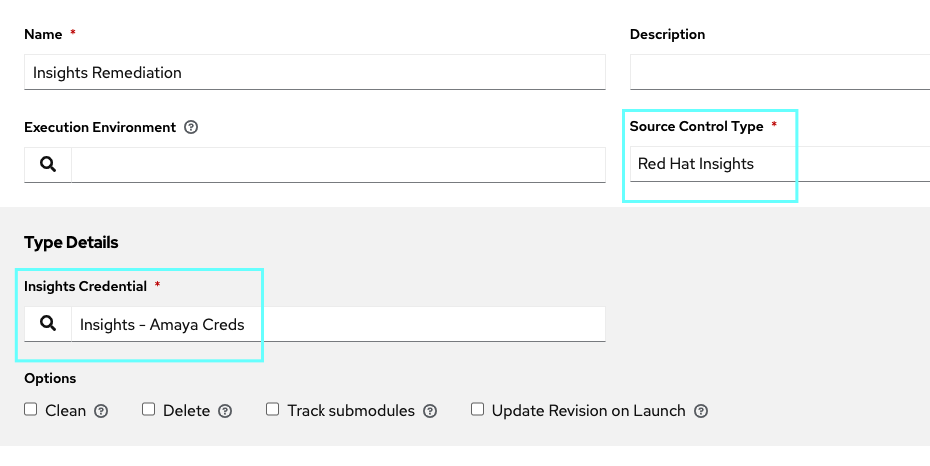
All SCM/Project syncs occur automatically the first time you save a new project. However, if you want them to be updated to what is current in Insights, manually update the SCM-based project by clicking the sync button.
This process syncs your Insights project with your Insights account solution. Notice that the status dot beside the name of the project updates once the sync has run.
Create Insights Inventory
The Insights playbook contains a hosts: line where the value is the hostname that Insights itself knows about, which may be different than the hostname that the Controller knows about. To use an Insights playbook, you will need an Insights inventory, the steps to create it are as follows.
First, create a simple inventory.

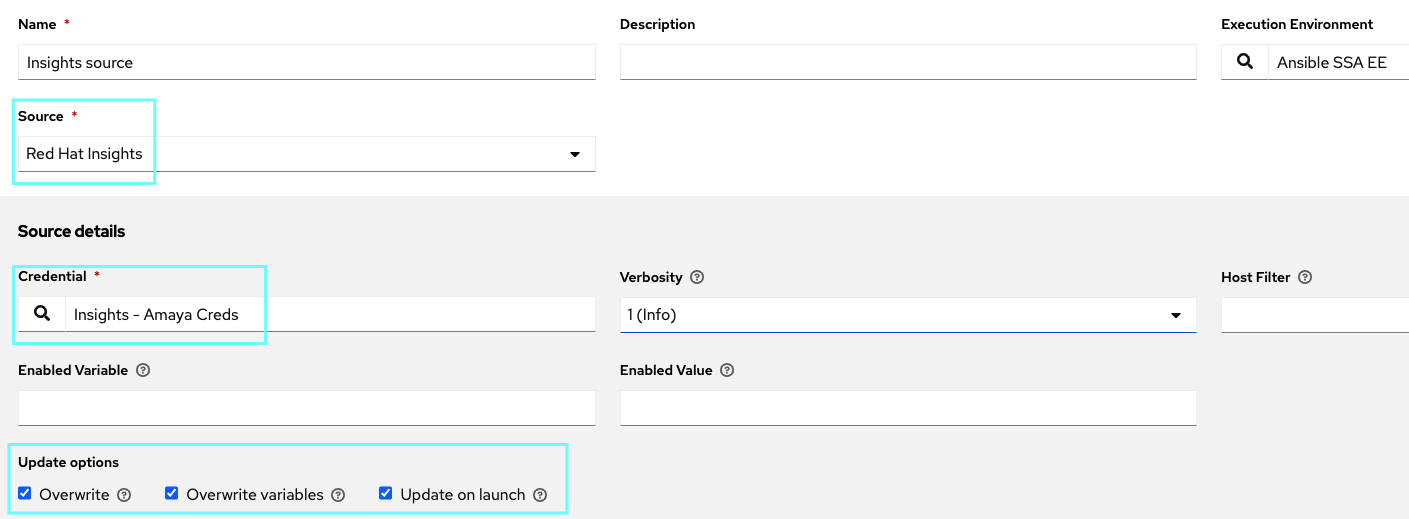
Then, in order to populate the host with whatever machines you have on your Insights account, you’d need to create an inventory source.
The important fields you need to field are:
- Source: select Red Hat Insights from the Source field.
- Credential: The Create Source window expands with the required Credential field. Choose our previously created Insights Credential.
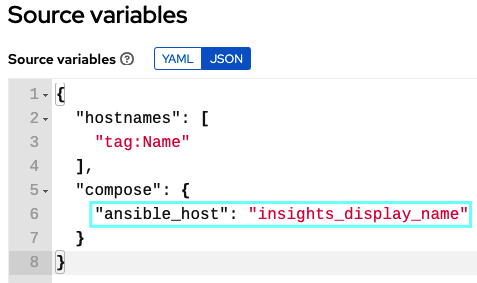
- Use the Source Variables field to override variables used by the insights inventory plugin.
It is important to note that this demo uses “source variables”, particularly, we need to set the hostname to be the insights_display_name, this is because we want to be able to use machines deployed on the cloud, where the hostname is normally the internal FQDN the cloud provider assigns, making it impossible to be accessed outside that instance using that name, we would need to use the name Insights uses.
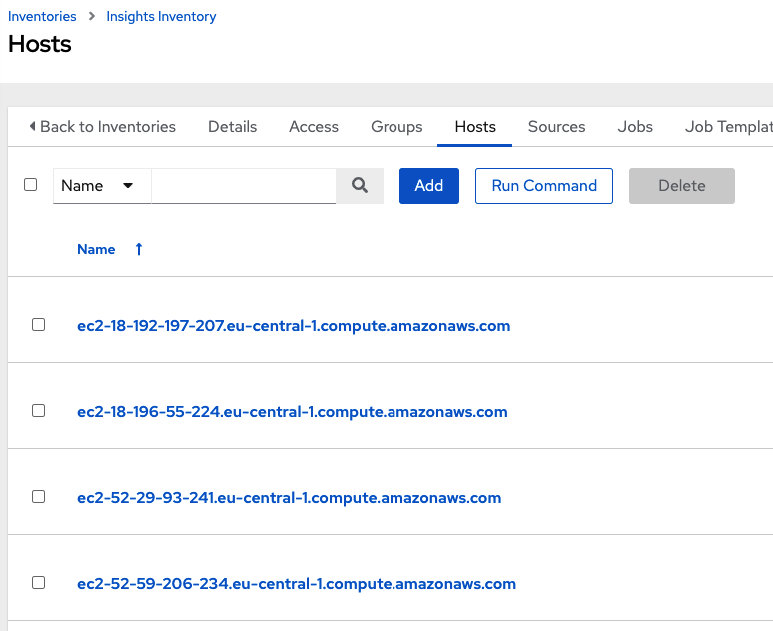
To double check it is all working as expected, go to the hosts tab and double check the names on the screen (those need to match the ones you see on the Insights console).
NOTE: In order to generate the proper Insights hostnames using the external FQDN, machines need to be registered forcing the display_name to match our needs, instead the default which is to use /etc/hostname.
NOTE: This value interacts with the insights-client --display-name command. If you use the CLI to change the display name but a different display name is enabled in the configuration file, the display name reverts to the configuration file value when the scheduler runs the Insights client.
NOTE: In this demo, we use the role Insights Registration to set the correct display-name instead of manually setting it with the insights-client --display-name command.
Further information on Insights naming can be found in the product official documentation Configuring Insights client.
Force Insights Issue
In order to show a common security vulnerability on Red Hat Linux systems, we are forcing our machines to have installed the adobe flash plugin. As this is a common issue, the Adobe Flash plugin for Firefox has been deprecated in Linux for several years now, and Flash itself is now officially unsupported by Adobe. You can find more info on this kb.
In order to install the plugin, in this demo we use the prepare-insights-issue.yml playbook, available on here. Do this before running the next template.
Once we’ve run that playbook, we would be able to see all our systems hitting the security vulnerability “Decreased security: Adobe Flash Player installed”, as shown in the image below:

Since that has a playbook to remediate, we will generate one in the Insights console for its use with Ansible Automation Platform as follows.
On the Advisor –> Recommendations menu, we select the machines affected by the vulnerabily and click on remediate, which will allow us to create a remediation playbook (we will call this adobe-flash, but feel free to chose your prefered name).

IMPORTANT: do not forget to sync your project, so it can pull the latest remediation playbook you have just created.
Remediate Insights Inventory
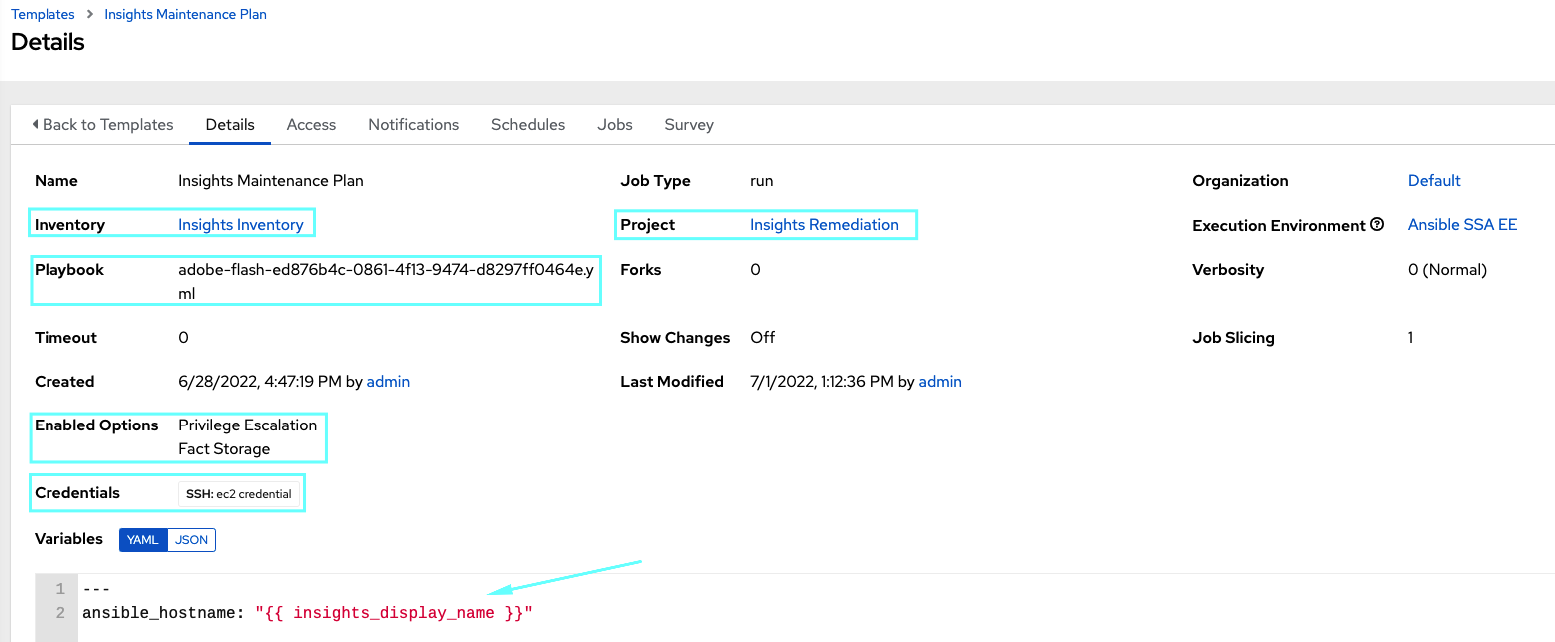
We now simply need to create a remediation template in our Automation Controller as follows.
The important fields you need to field are:
- Inventory: Select the Insights Inventory you previously created.
- Project: Select the Insights project you previously created.
- Playbook: Select a playbook associated with the Maintenance Plan you want to run from the drop-down menu list. In this case, it is the
adobe-flashwe previously created. - Credential: the machine credentials you use in order to log into your machines.
- Make sure you select “Privilege Escalation”
- Add the
ansible_hostname: "{{ insights_display_name }}"to the variables box in order for Ansible to use theinsights_display_nameas the hostname.
Now, simply launch the template and wait for its successful output.

Last, go to the Insights console and verify that the remediation plabook has solved the issue in all your systems. To do that, go to Remediations left menu and select adobe-flash where you will be able to see the issue has been remediated in your systems.
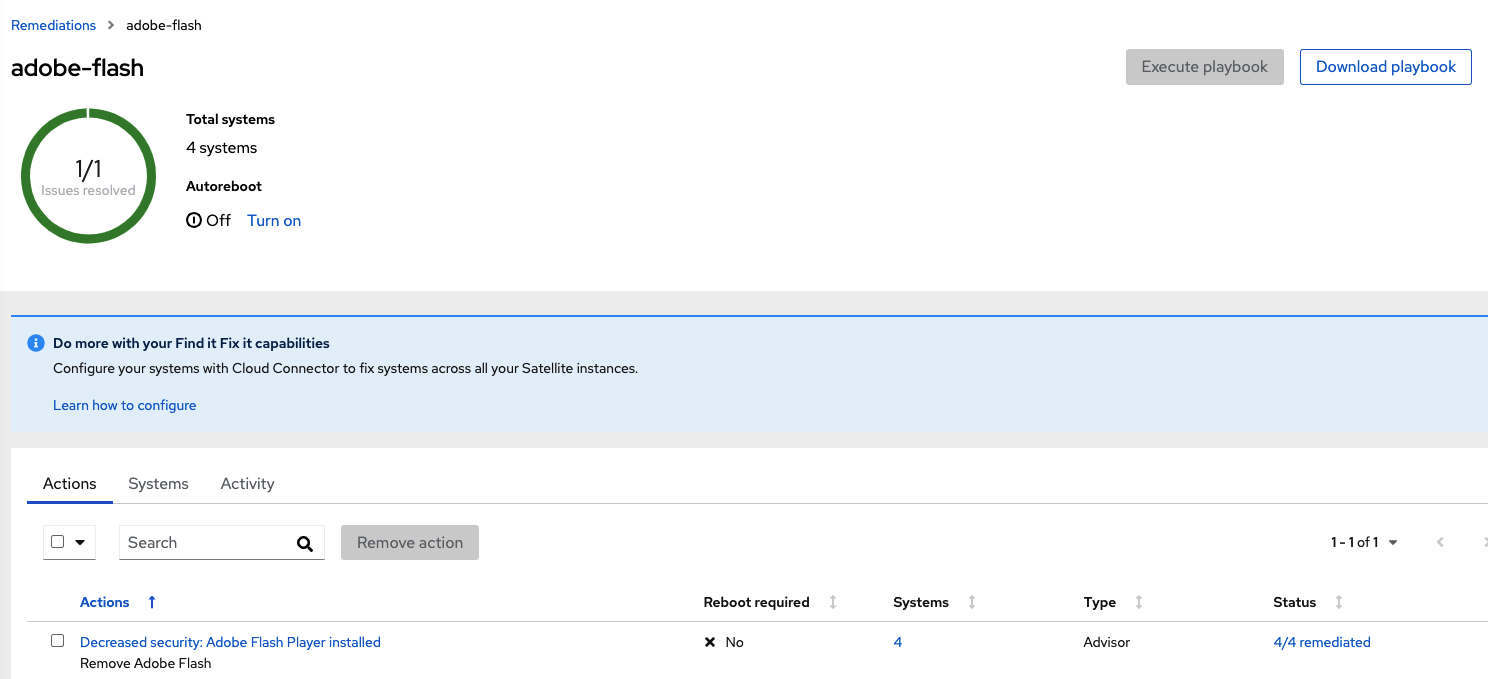
And just for the fun of double cheching, on the Advisor –> Recommendations menu, we can see, the issue has disappeared as well.
